Edit any listing from your admin panel & unlimited photos
Two updates that put more control in your hands. Team members can now edit every part of a listing — not just the private metadata — straight from the admin panel. And we've lifted the photo cap, so sellers can show off their items with as many photos as they like.
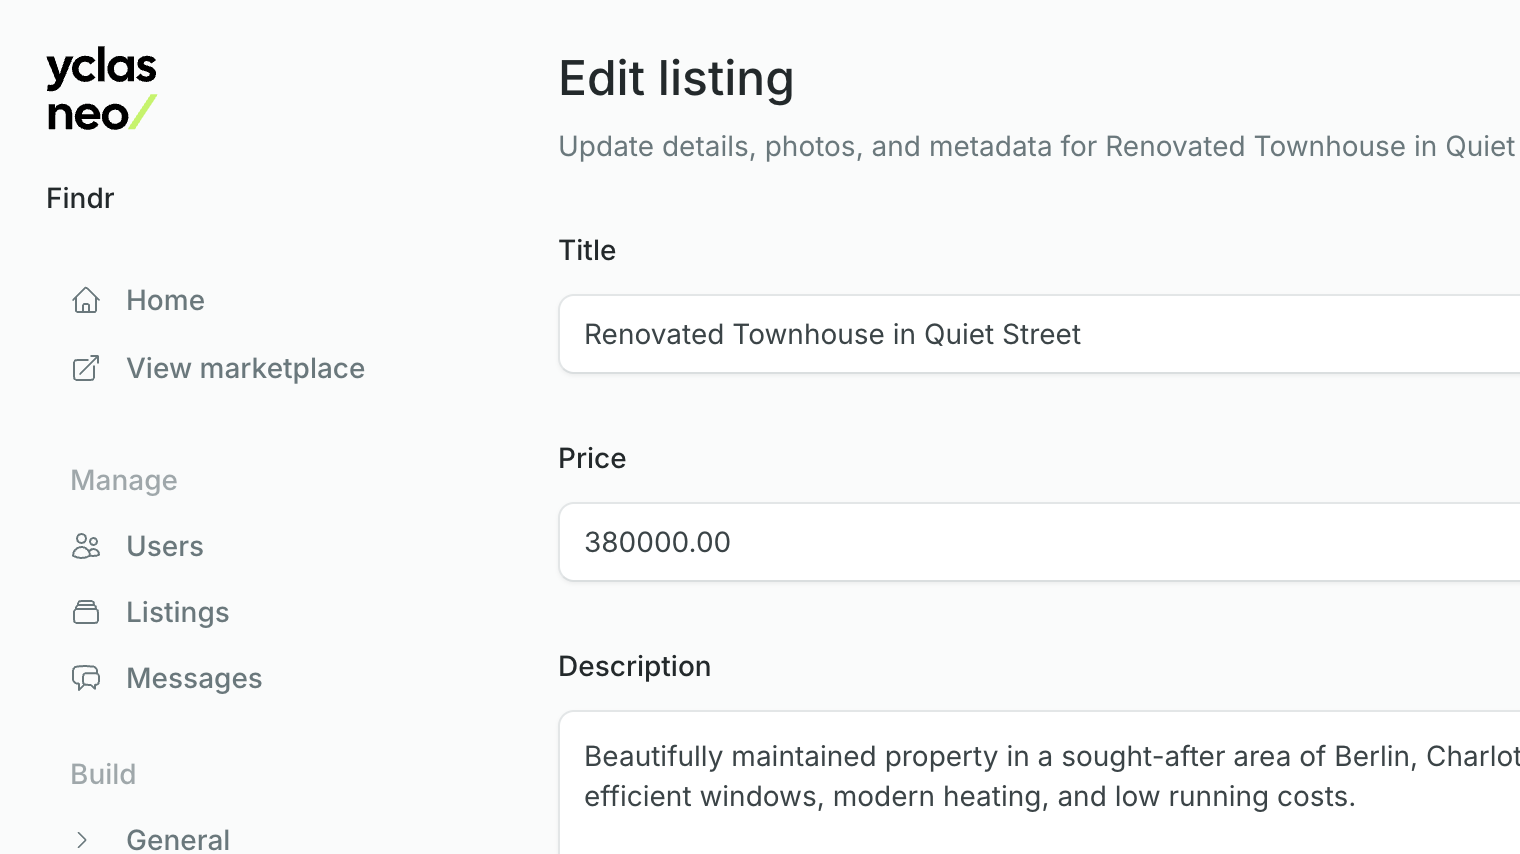
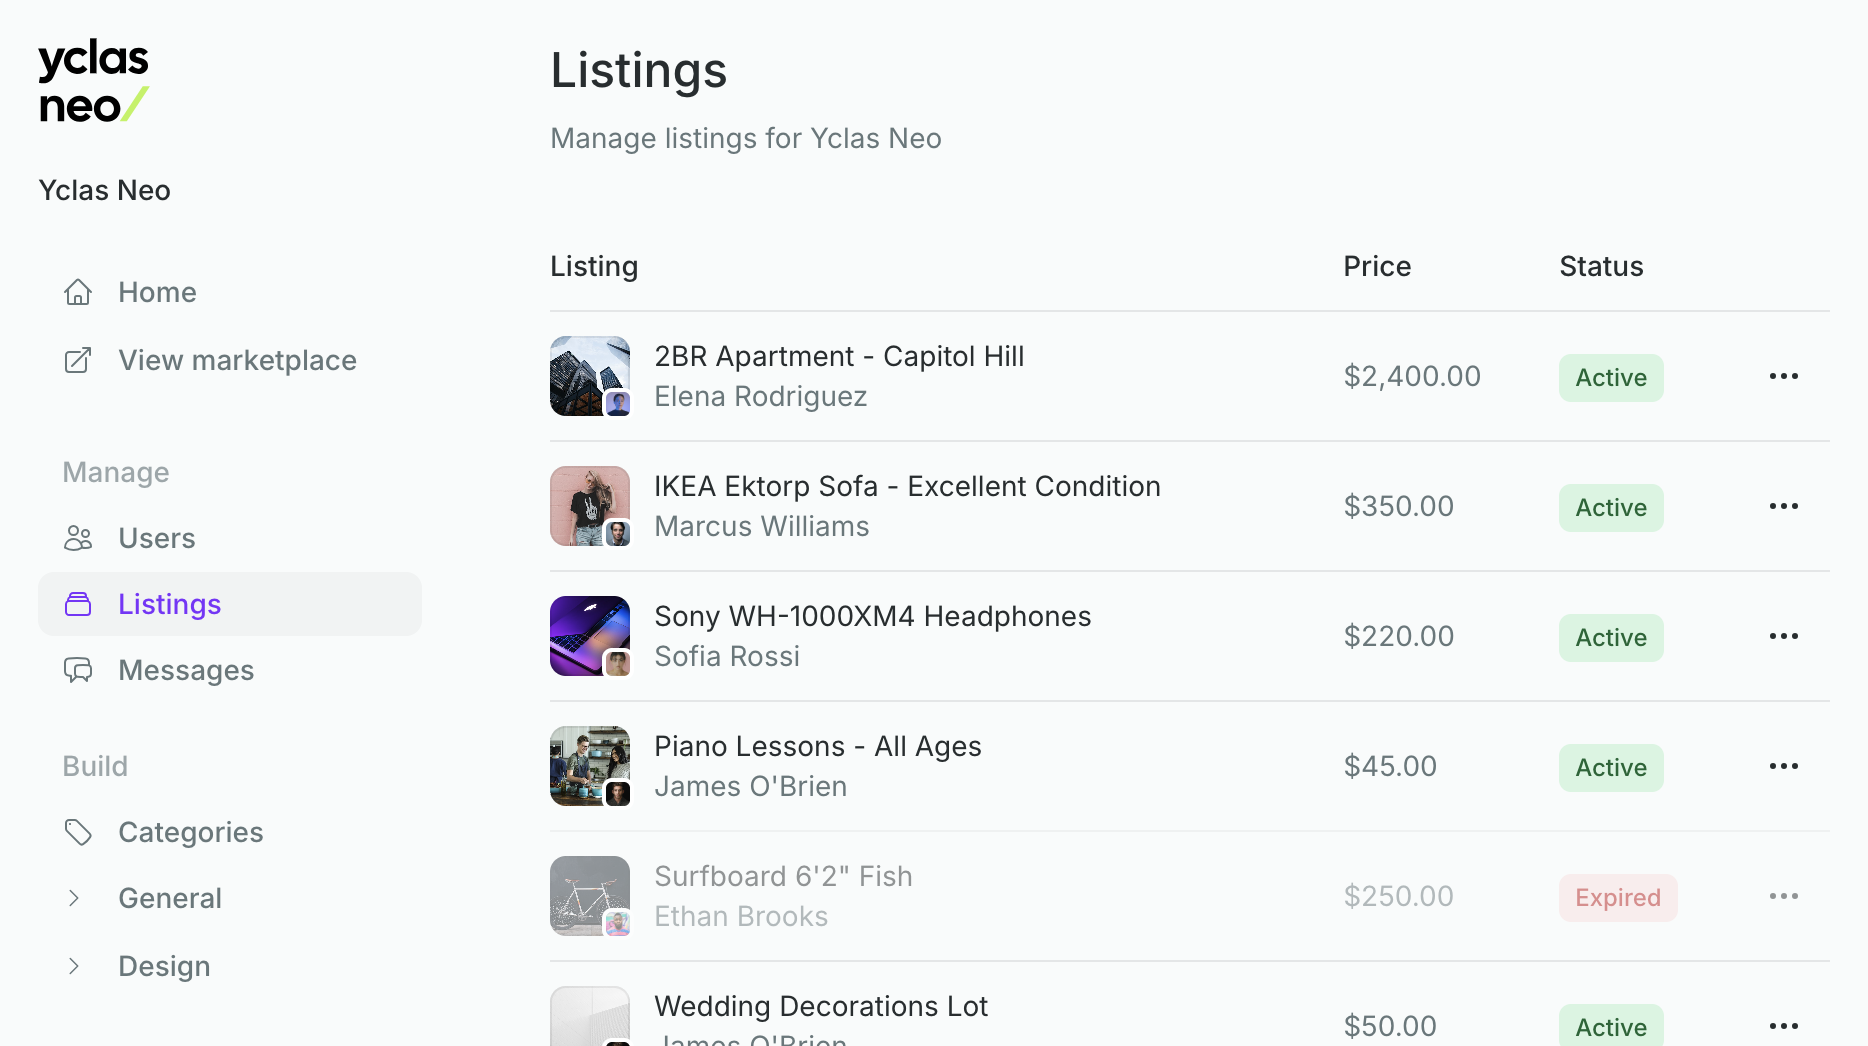
Full listing editing, from the admin panel
Until now, the per-listing edit page under Manage → Listings only handled your metadata fields. It now edits everything about a listing in one place:
Details — title, price, description, category (including subcategories), and location
Photos — add new photos, remove existing ones, and reorder the gallery by dragging them into position
Metadata fields — your private custom fields, right in the same screen
Fix a typo, correct a price, tidy up a category, or swap out a photo — all without waiting on the seller and without leaving the admin panel. It's available to every team member who can update the site, alongside the existing close, reopen, and delete actions.
No more photo limit
Listings used to be capped at 8 photos. That cap is gone. Sellers can now upload as many photos as they need — on the create page, the storefront edit page, and the admin edit page — with the same 20MB-per-photo maximum as before. It's a meaningful change for photo-heavy marketplaces like real estate, vehicles, and anything where more pictures mean more trust.
Also in this update
Fixed image uploads in the page builder — uploading a section background image or a content block image no longer fails with an error
Stability fixes — resolved errors that could surface on certain standalone requests and when a marketplace was reached through a non-storefront address
Subcategories, searchable custom fields & a faster storefront
Today we're adding two of the most requested organizing tools — a second level for your categories, and the ability to turn your custom listing fields into real search filters and sort options. We've also put keyword search front and center in your storefront header, added a setup checklist to get new marketplaces ready faster, and made every listing and avatar image load crisper and quicker.
Two-level subcategories
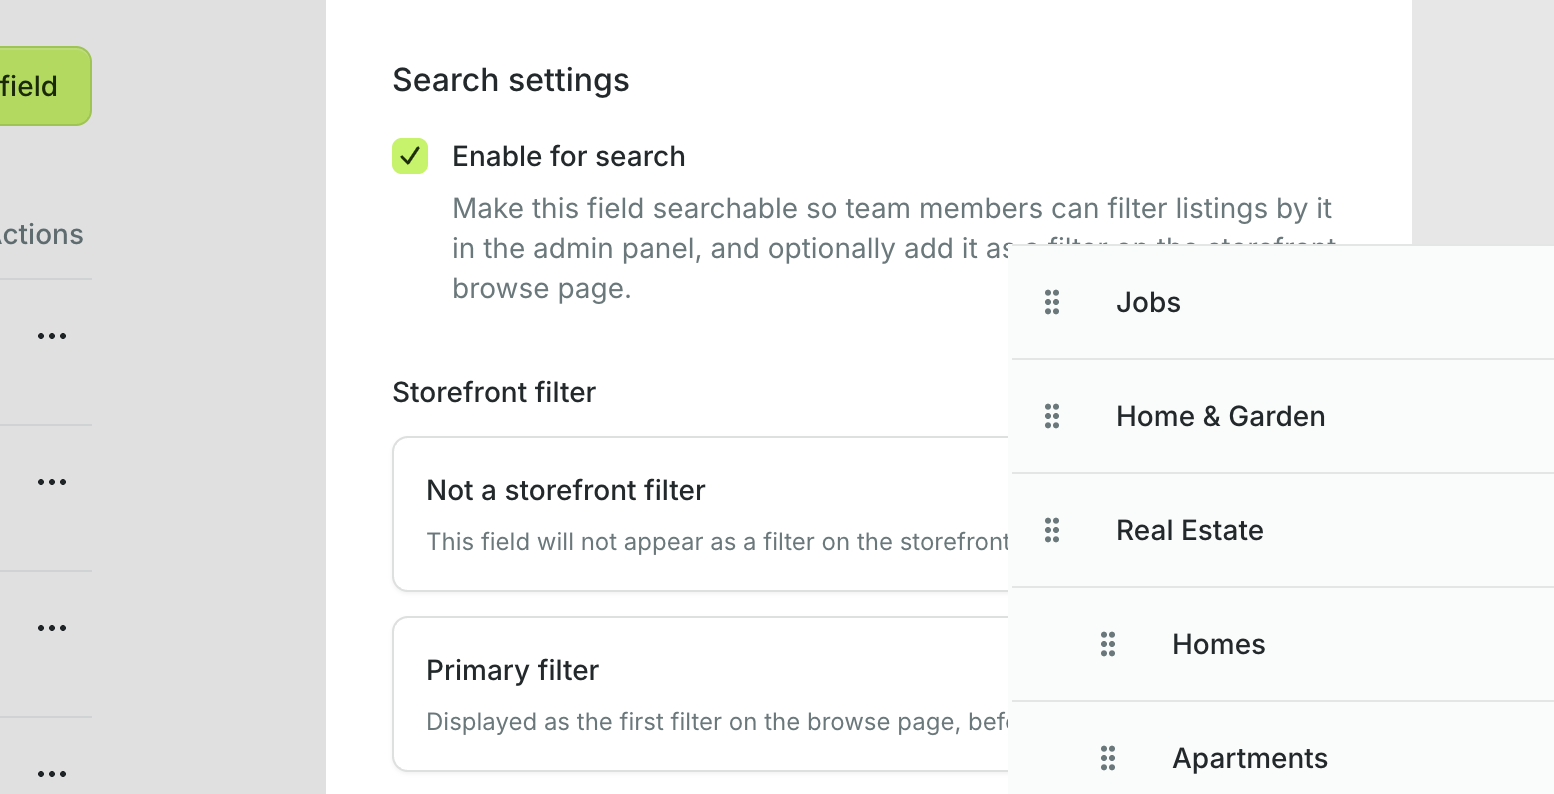
Categories can now have subcategories. Under Build → Listings → Categories, every category can hold its own nested list — so you can organize Vehicles into Cars, Motorcycles, and Boats, or Real Estate into Apartments and Houses.
Nested management — add subcategories with a parent selector, reorder within each level independently, and see aggregated listing counts that include every subcategory
Browse by parent — when a visitor picks a parent category on your storefront, they see listings from all of its subcategories at once
Inherited custom fields — a custom field limited to a parent category now applies to its subcategories too, so you set it once instead of repeating it
Deleting a parent category promotes its subcategories to the top level — nothing gets lost.
Searchable custom fields
Custom listing fields can now power search, not just collect information. Under Build → Listings → Listing fields, each field gains a Search settings section (except Video) that adapts to its type:
Text fields (single line & long text) — include them in keyword search, so the storefront search box matches against their values too
Number fields — enable them for admin filtering, add them as a storefront filter with a range slider, and turn them into sort options with low-to-high / high-to-low directions you choose
Select & Select multiple — enable them for admin filtering and add them as a storefront filter
Each filter and sort option has a placement — primary (shown before the default filters) or secondary (shown after) — so you control exactly where everything appears. On your storefront, the browse page gains the matching filters and dynamic sort options in the dropdown automatically. In the admin panel, the listings page gets a new filter flyout for narrowing results by any searchable field.
Keyword search, now in the header
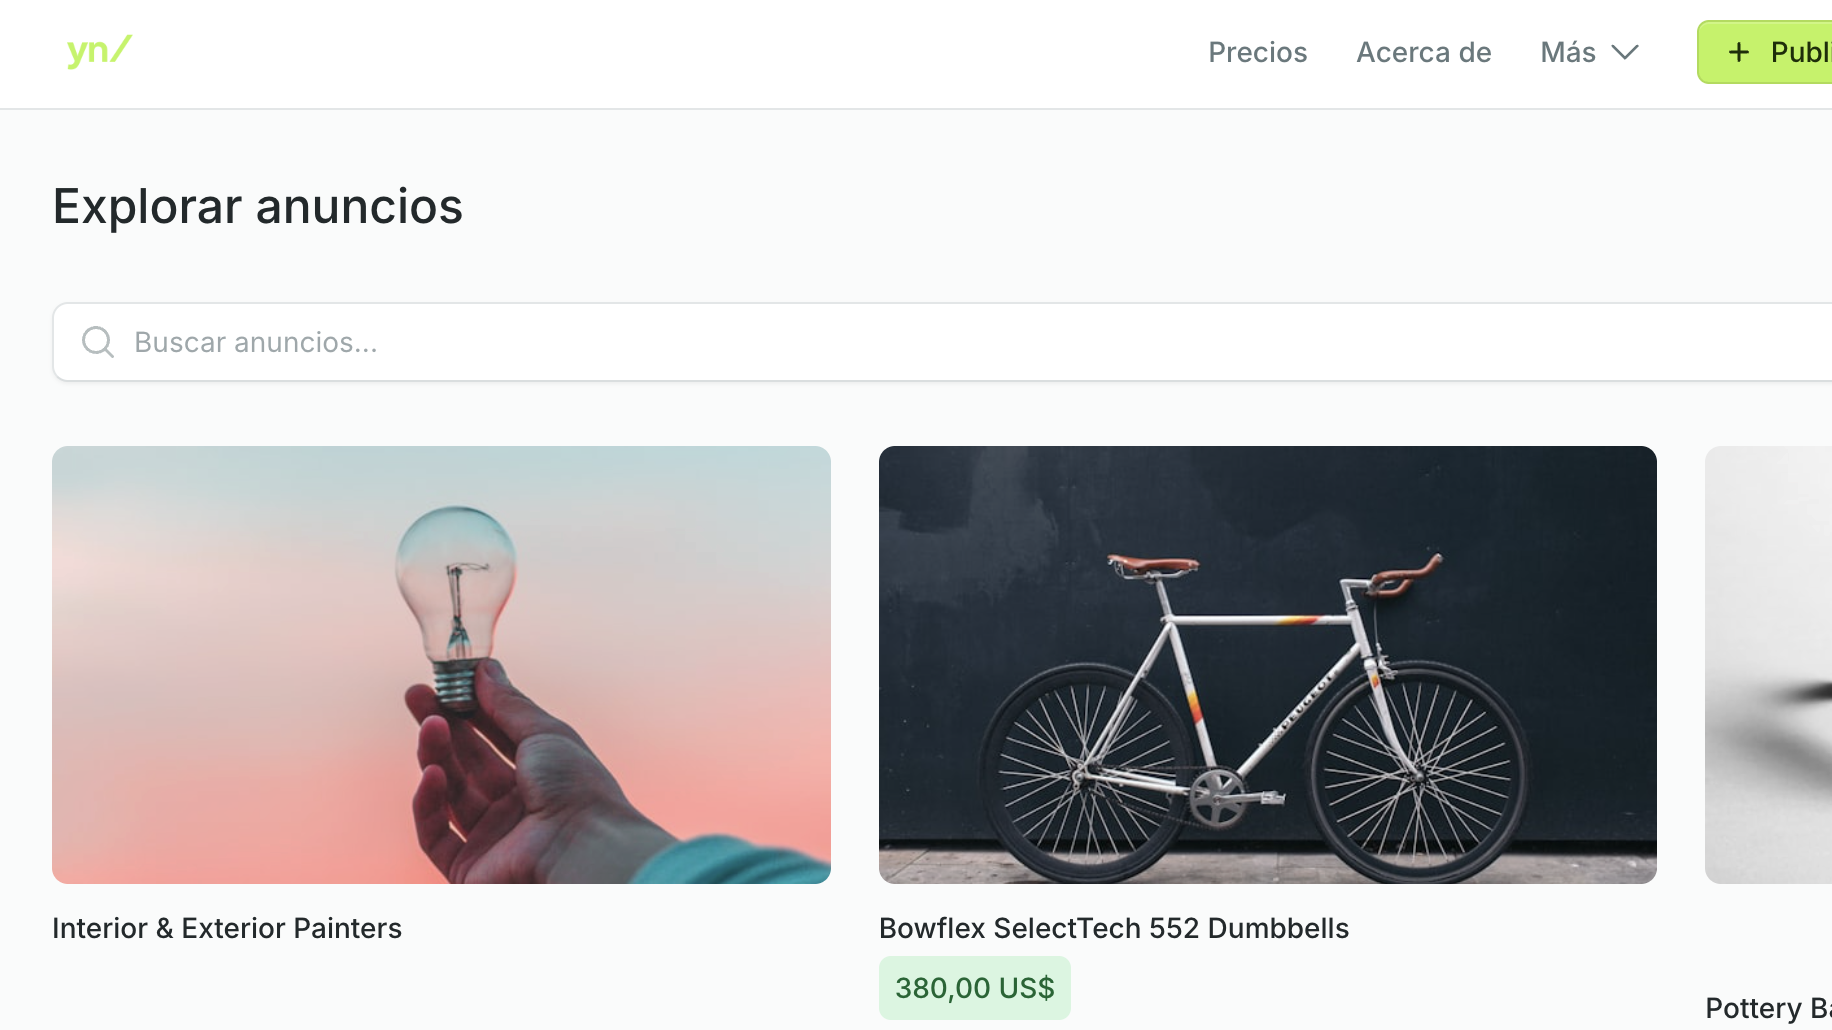
Search used to live only inside the browse page sidebar. Now there's a search box right in the storefront header on desktop and at the top of the mobile sidebar — so visitors can start searching from any page. It drops them straight onto the browse page with results ready.
A setup checklist for new marketplaces
The site Home page now walks you through everything that turns a blank marketplace into a finished one — add custom fields and filters, set your branding, build the welcome page, add content pages, and shape the footer — each step linking straight to the right place. It's the fastest way yet to get a new site ready.
Faster, crisper images
Listing photos and avatars now load through a responsive image service that generates the right size for every screen. Instead of downloading one large image, browsers fetch a smaller, sharper version sized to the device — so pages load faster and images stay crisp on high-resolution displays, with no action needed on your part.
Also in this update
Email verification for messaging — to cut down on spam, message notification emails are now only sent to users who have verified their email address, with a callout in the storefront reminding unverified users to confirm
Fixed a rare registration error that could occur when two visitors signed up with the same email at the same instant
Custom listing fields, a rebuilt browse page & better search
Listings used to be one shape for everyone — a title, description, price, category, and photos. Starting today, you decide exactly what information each listing collects, with custom fields you build yourself. We've also completely rebuilt the storefront browse page with a filter sidebar and sorting, and given you control over which filters and sort options your visitors see.
Custom listing fields
Under Build → Listings → Listing fields you can now create custom fields that collect specific information about listings, on top of the default fields. There's no code and no limit on how many you add.
Six field types cover most needs:
Single line text — a short text field (up to 70 characters)
Long text — a longer textarea (up to 5,000 characters)
Number — accepts whole numbers only, with optional minimum and maximum limits
Select — a dropdown with options you define
Select multiple — checkboxes where users can pick several options
Video — a YouTube URL, embedded automatically on the listing page
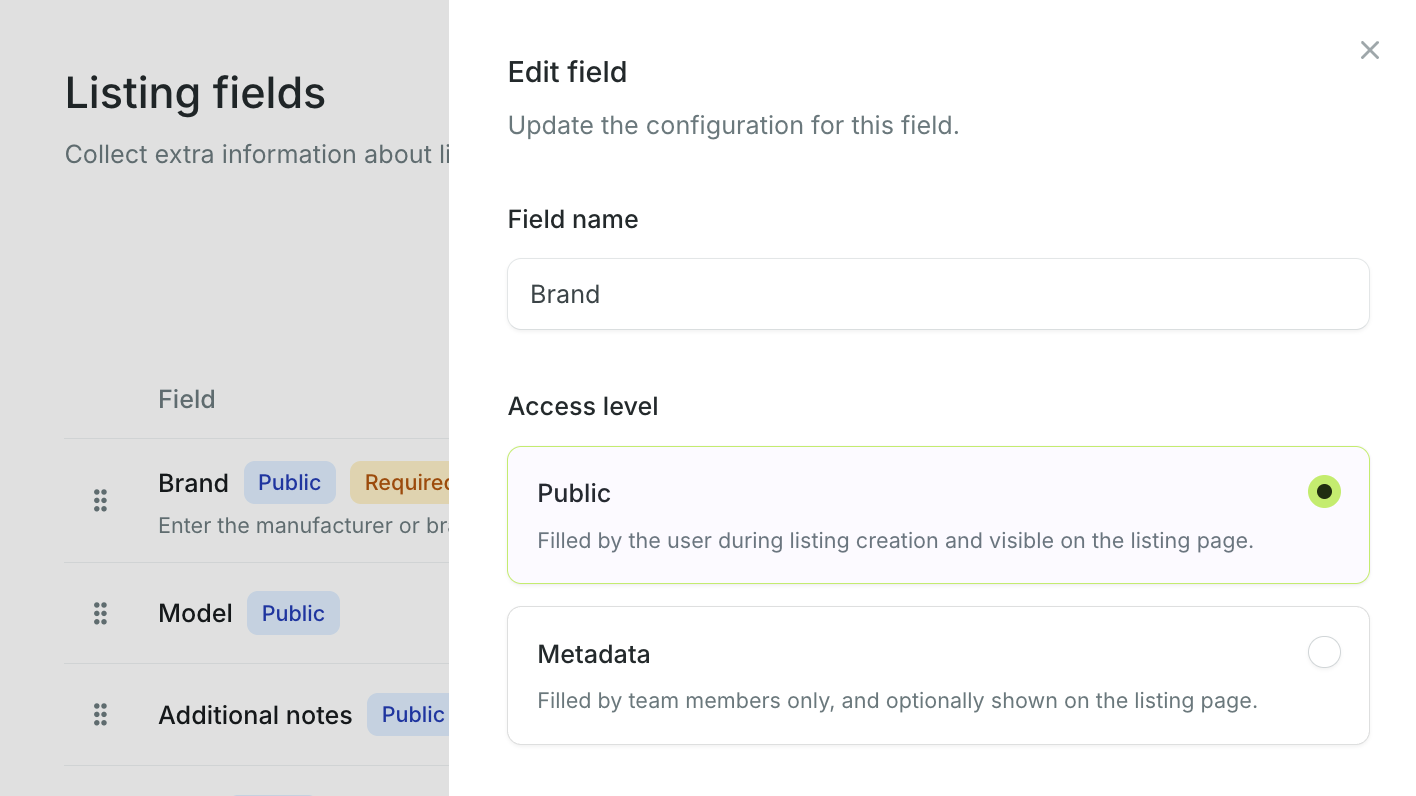
Every field has an access level that controls who fills it in:
Public fields are filled in by users while creating or editing their listing, and always show on the listing page. You can mark them required and add help text to guide users.
Metadata fields are filled in by team members only, from a dedicated edit screen on each listing. They're hidden by default, but you can toggle Show on listing page to display them to visitors.
You can also limit any field to specific categories. A "Year" field might only appear for the Vehicles category, while a "Bedrooms" field shows for Real Estate. Leave the limit unchecked and the field applies to every listing. Fields adapt automatically as users pick a category while posting.
The field builder is a drag-and-drop flyout — reorder fields and their options, configure everything in one place, and changes go live the moment you save. Selecting multiple options for a field? Reorder those by drag-and-drop too, and choose whether to show unselected options on the listing page.
A rebuilt browse page with filters & sorting
The storefront listings page has been redesigned from the ground up. Filters now live in a dedicated sidebar on desktop and slide in from a flyout on mobile, keeping the results front and center.
Keyword search across titles and descriptions, with a clear button to reset
Category filter — browse by category from the sidebar
Price range — a slider that narrows results to a price band
Sorting — newest, oldest, lowest price, or highest price
Search options you control
Not every marketplace needs a price slider. Under Build → Listings → Search options you can now choose exactly which filters and sort options appear on your storefront:
Toggle the category filter on or off
Enable the price filter and set the minimum and maximum bounds that power the slider
Pick which sort options visitors can use — newest, oldest, lowest price, and highest price, in any combination
If you disable every sort option, the browse page quietly falls back to showing the newest listings first. Everything updates on your storefront the moment you save.
A ready-made landing page, Google Analytics & Search Console
New marketplaces used to open on a bare list of listings. Today, every marketplace you create ships with a polished landing page built from the pages builder — and you can now wire up Google Analytics and Search Console to track traffic and own your place in search results. We've also reorganized the Build section so everything is easier to find.
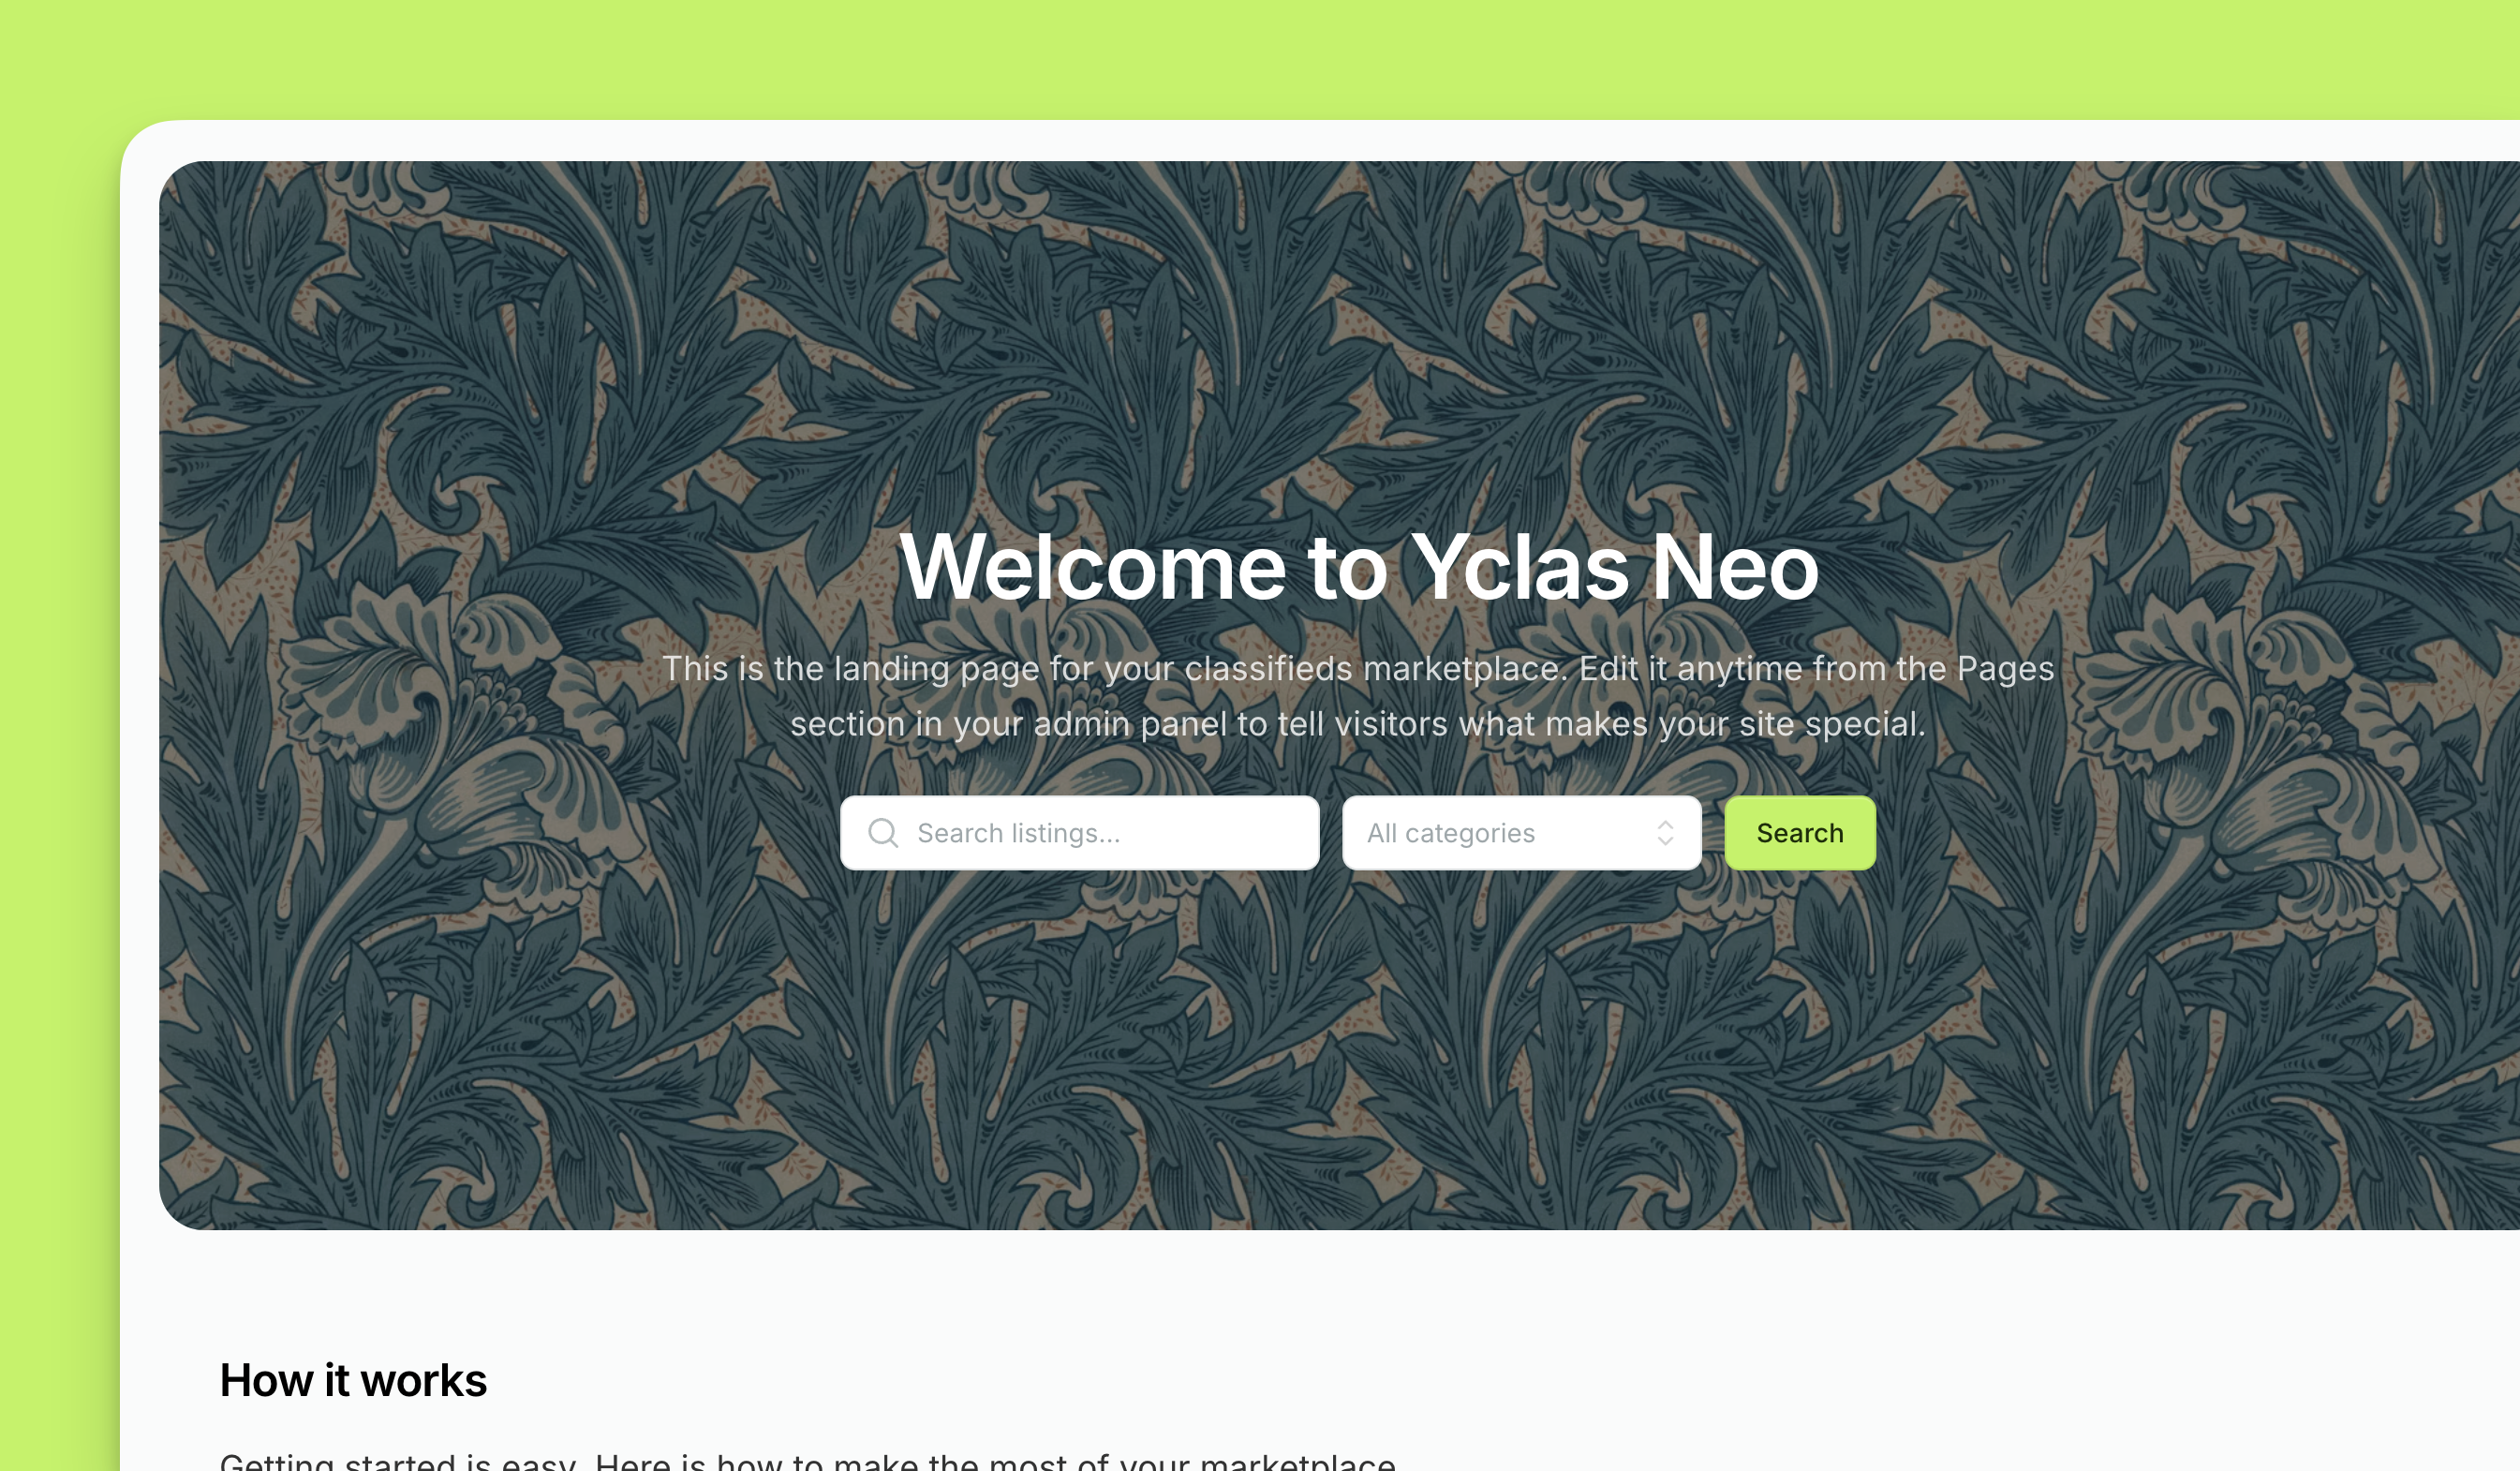
A landing page, ready the moment you create a site
Every new marketplace now opens on a Welcome page at the storefront root (/) instead of a redirect to the listings browse page. It's a real system page — fully editable under Build → Content → Pages — made from four sections:
A hero with a background image, your site name as the title, and a search field
A three-column How it works guide walking visitors through browsing, posting, and contacting sellers
A category carousel showing your default categories with real placeholder imagery
A YouTube video embed you can swap for your own promo or tutorial
Edit it like any other page — reorder sections, swap the text and media, or replace it entirely. We've added the same landing page to existing marketplaces too, so you'll find a Welcome page at the root of your storefront ready to customize.
Google Analytics, built in
Under Build → Integrations → Analytics you can now paste your Google Analytics 4 Measurement ID (the one that looks like G-XXXXXXXXXX). Once saved, the standard gtag.js snippet is automatically added to every page of your storefront — no theme edits, no tag manager, no deployments. Clear the field to pause tracking.
Google Search Console verification
To verify ownership of your marketplace with Google, head to Build → Integrations → Search Console and paste your Google site verification token (the value of the content attribute from the HTML tag method). We render the verification meta tag in your storefront's <head> automatically so Google can confirm ownership and you can monitor how your marketplace appears in search results.
A tidier Build section
The Build area of the site sidebar grew, so we've grouped related settings together. Pages, the Top bar, and the Footer now live under Content; Branding and Listing layout under Design; Categories under Listings; and the new Analytics and Search Console under Integrations. Everything is still exactly where you'd expect it — just better organized.
Also in this update
New marketplaces now ship with two default footer blocks already in place — Quick Links (Browse listings, Post a listing) and Legal (Terms of Service, Privacy Policy) — so the footer isn't empty on day one. We've added them to existing marketplaces too
Storefront registration now requires visitors to accept the Terms of Service and Privacy Policy before creating an account, with links that open each system page in a new tab
A Changelog link is now available in the app, settings, and site sidebars so you can keep up with what's new
Storefront pages, footer & listing layouts
Until now, your storefront was a fixed shape — homepage, browse, listing detail, and the rest all laid out the same way. That changes today. You can now build your own storefront pages from scratch, customize the footer, and choose how listings present their photos. Three new tools, all under Build, all live the moment you save.
Build your own storefront pages
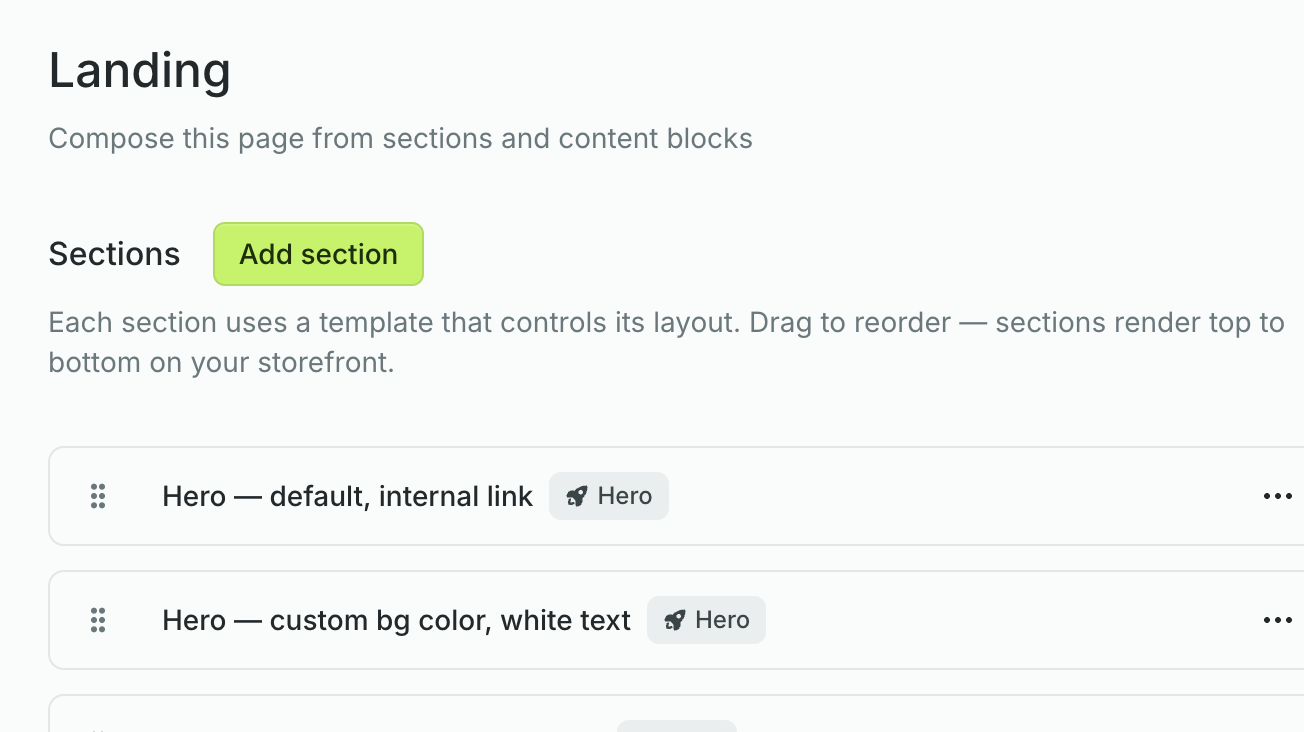
Under Build → Pages you can compose landing pages, about pages, privacy policies, terms of service — anything you'd want a standalone page for. Each page is built from sections, and each section from content blocks, with no code and no deployments.
Six section templates: Hero (title, description, and call to action), Article (stacked reading), Carousel (horizontally swipeable blocks), Columns (1–4 column grid), Features (text and media side by side, alternating), and Listings (up to ten of your marketplace's listings in a swipeable carousel)
Content blocks inside each section carry a rich-text body, optional media (an uploaded image or a YouTube video), an optional link, and alt text
Per-section appearance: keep the default look or set a custom background color, overlay, content alignment, and rounded corners
Pages publish to /p/{slug} and show up in your storefront navigation however you wire them up via [Top bar](/docs/topbar) links
Reorder sections and blocks by drag-and-drop; everything updates on the storefront instantly
System pages, ready out of the box
Every new marketplace now ships with two system pages already seeded — Terms of Service and Privacy Policy — each pre-filled with a starter Article section. They're marked with a System badge and can't be renamed or deleted (their content is fully yours to edit). We've also added them to existing marketplaces, so you'll find them under Build → Pages even if your site was created before this update.
Customize your footer
Under Build → Design → Footer you can now shape the storefront footer per site:
Slogan and copyright notice at the top of the footer (copyright falls back to the current year and your site name)
Social media links — drag-and-drop, with support for Facebook, Instagram, X (Twitter), LinkedIn, YouTube, Pinterest, and TikTok, each rendered as its platform icon
Content blocks — orderable rich-text blocks laid out in a configurable 1–4 column grid (default two), perfect for link lists, contact details, or an "About" blurb
Listing layouts
Under Build → Design → Layout you can now choose how listings present their photos, per site:
Image carousel with thumbnails (default) — photos rotate in a swipeable carousel with indicator dots. Ideal for product classifieds
Screen-wide cover photo — the first photo becomes a large hero, with remaining photos available as clickable thumbnails. Ideal for property rentals and listings with beautiful landscape images
Pair either layout with a thumbnail aspect ratio for listing cards across the homepage and browse page: Landscape (4:3), Portrait (3:4), or Square (1:1)
Also in this update
Content blocks now support YouTube videos as a media type, embedded privacy-friendly via youtube-nocookie.com with the same aspect-ratio options as images
The block text renderer now properly styles h1–h4 headings with the right size, weight, and spacing
Custom top bar nav links now show to logged-out visitors on desktop as well as mobile (previously desktop guests missed them)
Storefront translations & top bar customization
Your storefront got a lot more yours today. You can now translate (or just rename) every piece of storefront copy and every email notification your site sends, directly from the admin panel — no language files, no deployments. And you can shape the top bar to match: custom navigation links, a logo click destination of your choice, and a toggle for whether logged-out visitors see the Post listing button.
Both features live under Build in the site sidebar and apply instantly — there's no separate publish step.
Translate your storefront
We ship with complete base translations for English, Spanish, German, and French. Pick one from Localization and your storefront is ready to go. Anything you want to tweak lives under Build → General → Translations:
Every storefront string and transactional email in one place, grouped by area (navigation, listings, messages, account, emails)
Click any row to edit it inline. Empty values fall back to the default, so you only override what you want to change
Translations follow your locale with a regional fallback chain — switch from Spanish (Spain) to Spanish (Mexico) and we walk es_MX → es → en so nothing shows up as raw text
Changes apply to your storefront and transactional emails — confirmation, password reset, listing expiration, message notifications
Customized rows show a green Customized badge, and you can revert any string to its default with one click
Want to rename an English string instead of translating? It works exactly the same — overrides aren't limited to other languages
Customize your top bar
Under Build → Design → Top bar you can now configure the storefront header per site:
Logo click destination — send visitors to a relative path like /listings or any external URL. Leave blank to keep the default (your storefront home)
Post listing link — toggle whether logged-out visitors see the Post listing button or just the sign-in prompt. Logged-in visitors always see it
Custom nav links — add as many as you need, each with a label, URL, and placement. Top bar links appear in the storefront header next to the inbox; secondary links tuck under a More dropdown. They're visible to everyone — logged-in visitors and guests alike
Internal URLs use in-app navigation; external URLs open in a new tab with rel="noopener"
Drag-and-drop reordering, with a shared modal for adding and editing links
The mobile sidebar mirrors whatever you set up — no extra configuration needed
Custom domains
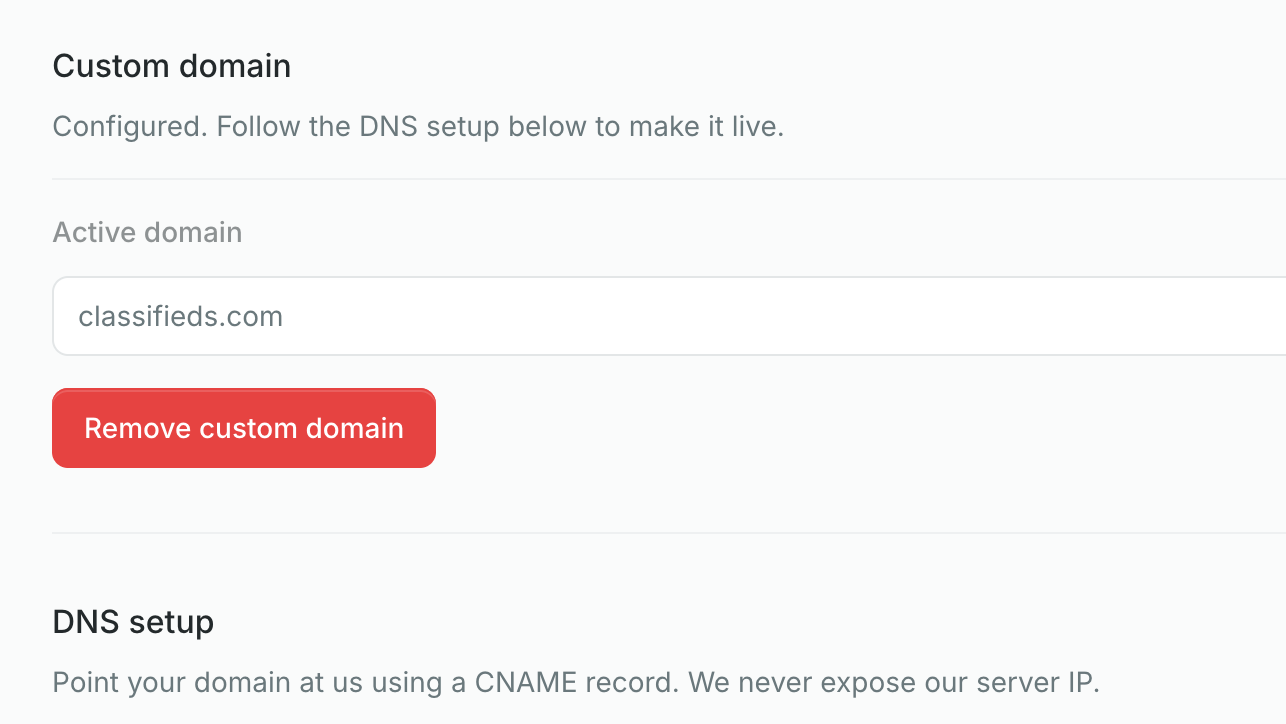
From day one, every marketplace has shipped on a yoursite.on-yclas.com subdomain — fine for getting started, less fine once you're paying for ads, printing flyers, or just trying to look like a real business. That ends today: you can now point any domain you own at your storefront.
Add a CNAME record at your registrar, hit Check DNS, and HTTPS provisions itself on the first visit. Both the bare apex (example.com) and the www variant work — no extra configuration required.
How it works
Open Build → General → Domain on any site and enter the bare domain you want to use
We give you the exact CNAME values to paste at your registrar — no guessing, no DNS jargon
SSL certificates are issued automatically the first time a visitor loads your domain (10–30 seconds)
Your original subdomain keeps working as a fallback, so nothing breaks during the switch
Details worth knowing
Domains are case-insensitive and lowercased on save, so Example.com and example.com are treated the same
A custom domain can't collide with another site's subdomain or another site's custom domain — we validate on save
Cloudflare users: switch the proxy to DNS-only (grey cloud) until you're live, then turn the orange cloud back on with SSL/TLS set to Full
The DNS checker inspects the www record, so it won't see your CNAME if Cloudflare's proxy is hiding it — that's expected, not broken
Moderation tools & storefront refresh
Until now, launching a marketplace was the easy part — actually running one was another story. That changes this week: you can now moderate listings, manage users, review conversations, and customize your site's branding, all from the admin sidebar.
We also took the opportunity to freshen up the storefront. Listings, seller profiles, and messaging each got a redesign, so your buyers and sellers get something that feels considered rather than cobbled together.
New management tools
Added a listings manager to close, reopen, or delete any listing on your site
Added user management with ban and delete actions, including GDPR-compliant cleanup of personal data
Added a messages page to review full conversation timelines between your buyers and sellers
Added site branding — upload your own logo, favicon, app icon, and social share image
Storefront refresh
Redesigned the storefront, listing pages, and public seller profiles with a cleaner, more modern layout
Redesigned messaging as a tidy inbox with a chat-style conversation view
Added seller profiles with photo, bio, and account settings
Added a dedicated seller dashboard for managing listings, including the ability to close and reopen them
Increased the photo upload limit from 5 MB to 20 MB
Fixed a bug that showed the wrong latest message in the inbox preview
Renamed the guest call-to-action from "Sign up" to "Publish listing" so it's obvious what happens next